
Just after Thanksgiving, I decided to try my hand at sourdough. My general approach to a new recipe or technique is to take a look at the top several search results, weigh the varying advice and ingredients lists, and make an amalgum. When I tried this for sourdough, I was struck by the large variety of techniques espoused by various bloggers and youtubers. Many seemed quite committed to the precise measurements & steps involved, but they were short on explanation for why or how these were so important. I looked around for someone who had done the testing to determine the impact of, for example, a bench rest, and came up empty.
So here we are.
This post is the result of my experimentations – starting with the recipe, as I wish all food bloggers would – with links to discriptions of the various tools and techniques involved in making sourdough bread. I’ve also written up a summary of each of the tests I’ve done, and at the end you get my favorite way to use discarded starter.
In case you don’t already have a sourdough start maintenance rhythm, here’s mine.
The Loaf Recipe
Ingredients
2c (475g) water
250g all-purpose flour
250g whole wheat flour
1T (5g) salt
2T (15g) water
Optional mix-ins
Seeds: 1/4-1/3c each of chia, flax, and sunflower seeds.
Cranberry walnut: 900g craisins, 750g walnuts, chopped.
Jalapeño cheddar: 9 jalapeños, diced. ~3 inches of a block of sharp cheddar, cubed.
If using mixins, skip the autolyze step and just dump everything together at once.
Instructions
Add salt and remaining water, mix until combined, cover again and leave on the counter.
Let sit (in a container, covered) for 8-12 hours for the bulk rise.
Dump onto the counter, do an initial shaping using some bench scrapers. “Bench rest” for 30 minutes.
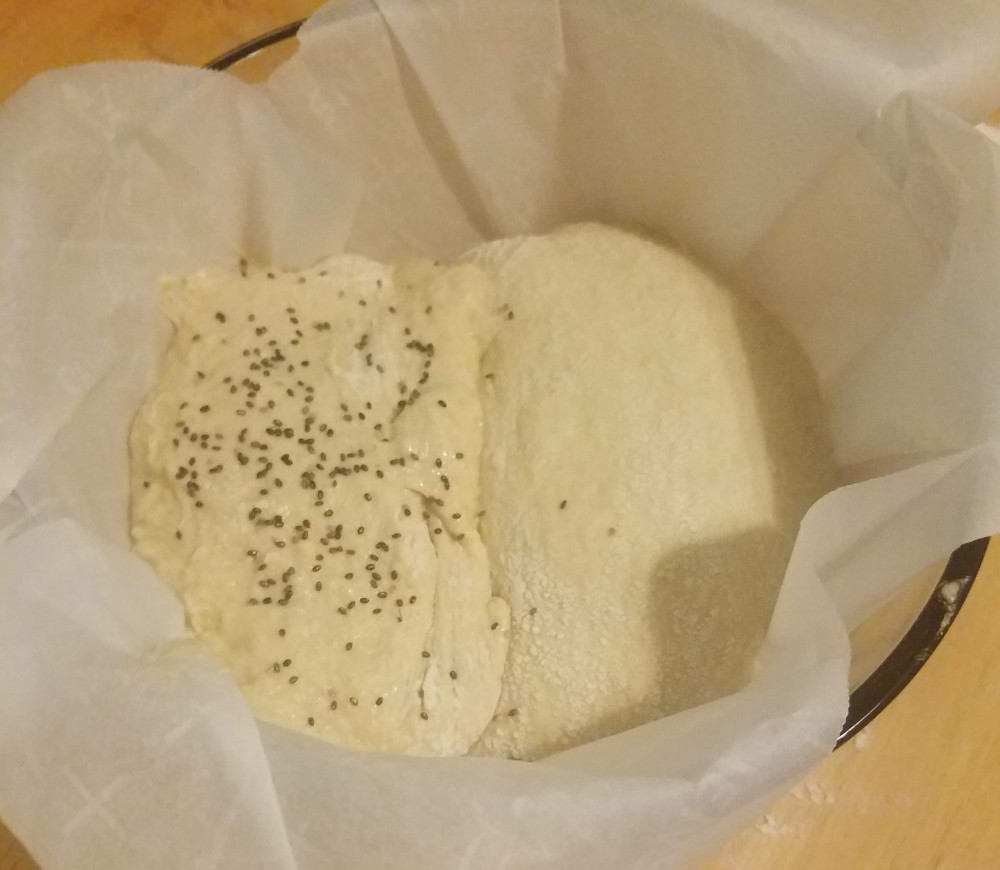
Do the final shaping, place in a parchment-paper-lined container for the final rise (60-90 minutes, until ~doubled).
Place your dutch oven in the oven, and preheat the oven to 500º. (If you don’t preheat the dutch oven, the crust will still be good, but not mind-blowingly good, see Test 6)
Once the oven is up to temperature, place the dough in the dutch oven (the parchment paper should help with this).
Bake, covered, for 30 minutes. (If you forget to put the cover on, the crust will be much less awesome, see Test 5)
Take the lid off the dutch oven, and bake for another 10 minutes.
Turn off the oven, take the loaf out of the dutch oven, and let it sit in the warm oven for another 10-15 minutes to cure the crust and dry out the loaf. (If you can’t wait and just want to dig in, it’s OK, but the inside might be more moist than you want).
Terms & Techniques
Whole-Wheat Flour
I grind my own flour, using a hand-me-down Excalibur wheat grinder from my grandmother that’s probably 50 years old. I get hard white wheat in 25lb bags from the local supermarket, which lasts me 4-8 months, depending on how much I’m baking.
In my (certainly uninformed) opinion, there is just no substitute for freshly-ground whole wheat flour. Any whole wheat flour I’ve bought from a store tastes terrible in comparison – if it’s a choice between store-bought all-purpose and store-bought whole-wheat, I’d go will all-purpose (in the US at least. I’ve had good experiences with store-bought whole-wheat in Germany). But in a contest between home-ground whole-wheat and any all-purpose or bread flour, bread made with the whole wheat flour tastes so much better, you can’t even imagine.
Starter
At the beginning of my sourdough journey, I did a bit of experimenting with different starter formulas, but at the moment I’ve settled on 1:5:5, fed with unbleached all-purpose flour.
A “young” starter is start that has just finished doubling. For the 1:5:5 100% hydration formula that I ended up adopting, this means using the start 8-12 hours after feeding (I would generally feed it in the morning, then start the loaf at night).
In Test 3 I evaluated using a “young” start vs an “older” start that hadn’t been fed for 24 hours, and they both turned out fine. So my general approach is: if you do remember to feed the start 8 hours before you want to make the dough, that’s great, but if not, the bread will still be fine – it might just be a little more sour.
People talk about “the float test” as the way to determine whether your starter is “ready” to leaven some dough. I believe the theory is that once starter has “risen,” it has a lot of trapped gas bubbles, and those will cause it to float. I don’t use it at all, mostly because it seems like a waste of starter, but also because I’ve just never had dough fail to rise. I’ve used starter that’s “old” and would fail the test because the gases have escaped, and it worked fine. It’s possible that the float test is more critical when you’re first developing your starter from scratch (a step I skipped by being gifted some already-mature starter).
My current starter maintenance process
in the morning, or at night, either when I’m making bread, or it’s been long enough that I feel I should feed the start (I draw the line around 36 hours), I take most of the starter out of my wide-mouthed pint glass jar, shooting for a combined weight of ~285g. The jar weighs 275g, so that means there’s about 10g starter left in the jar.
I then add 50g of unbleached all-purpose flour and 50g water, and mix it up.
If I’ll be making a larger loaf that night, I use 60g water and 60g flour, and might leave as much as 20g of starter.
If I’m not making bread with the starter I’ve taken out, I put it into the glass container I keep in the fridge of old starter, to be turned into a savory sourdough flatbread later.
The mixed starter will then double over the course of the next ~8-16 hours, and then slowly fall back down to its original height (taking on a more soupy consistency) in the 16-24 hours after that.
For the past several weeks I’ve been making a loaf every other day or so, so this rythm has been working quite well. If you want your starter to grow more slowly, so you feed it less often, leave it in the fridge. At some point I want to do a test where I compare bread from starter that’s been incubating in the fridge to starter that was just recently fed on the counter, to see if there’s a noticable difference.
Autolyze
The “autolyze” step (from biology, self-digestion) was apparently championed by a French “bread expert” in the 1970s in response to what he saw as a deterioration in french bread. Its purpose is to allow the water to break down the flour a little bit before you introduce the salt (which apparently inhibits the process somewhat?).
Dough Hydration
My recipe is 95% hydrated, which is definitely on the higher end of the scale. What’s weird is that I see people talking about a “high hydration sourdough”, naming percentages like 75% (2) (3), 80%, 83%, so I don’t know if the recipe I got is way off in the weeds? It’s also possible in my mind that using half whole-wheat messes with things somewhat – that the whole-wheat flour would absorb more water or something.
Turns
“Turns” seem to be a mix between “punching down the dough” and “kneading”, and many people talk about the “stretch and fold” method (you can find many youtube videos of people demonstrating this). I’ve never yet tried this method, because I’m lazy and would rather not get my hands dirty 🤷. What I do is use a firm plastic spatula to fold the dough over itself & push it around, similar to what I do during the initial mixing. I’ve tested doing these turns vs not doing them, and it didn’t seem to make an important difference, so I’ve dropped this step from my practice. Of course, it’s possible that if I used the more standard method I would get different results.
Bench Scrapers
If you don’t have these, prepare to get several spatulas dirty, and generally have a hard time of it.
I got mine at WalMart, $5 each. They are 6’’ wide and 4.5’’ tall, which has been a pretty good size. When first starting out I was using one that was only about 4’’ wide, which was rather too narrow for comfort.
You can get by with just one, but two is much nicer, as you can use one to separate the other one from the dough. Honestly there are moments when I wish I had a third.
Shaping
The method that I’ve adopted is: after dumping the dough on the table, use the bench scraper to fold the dough over itself, starting at one side putting the scraper an inch or two under the dough and then dragging it over to the other side. Having a second bench scraper is quite helpful in extricating the first scraper from the dough after folding. Then go around the circle 2-4 more times until it has formed a rough ball. Then push your bench scraper along the table into the dough, pushing the dough across the table for a foot or so, so that it “rolls up” a bit, forming some surface tension. Do this several more times from different angles, using the second bench scraper to help remove the first from the sticky dough each time. After the bench rest, repeat the same process once more. You can also find a number of youtube videos demonstrating this shaping technique.
Parchment Paper
My current process involves letting the dough do the final rise in a pyrex cake pan lined with parchment paper (8’’ round, ~4’’ high), and then using the parchment paper to transfer it into the preheated cast iron dutch oven. The hope is that this minimizes volume loss in the transfer, but I don’t love that it requires using a lot of parchment paper.
Dutch Oven + Oven
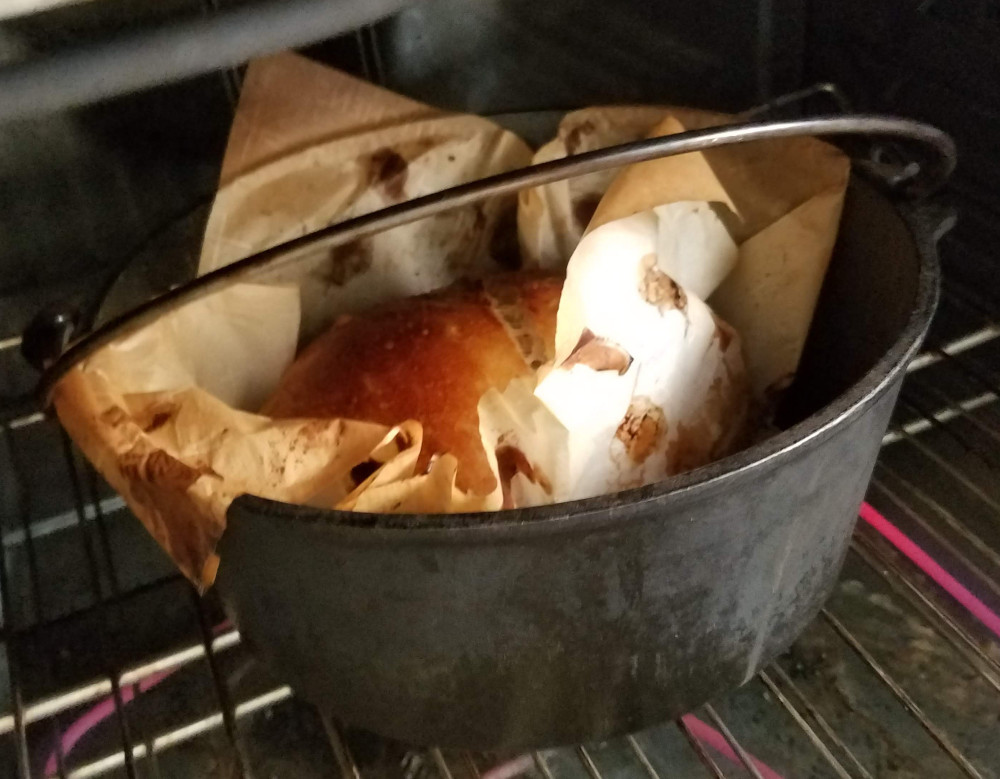
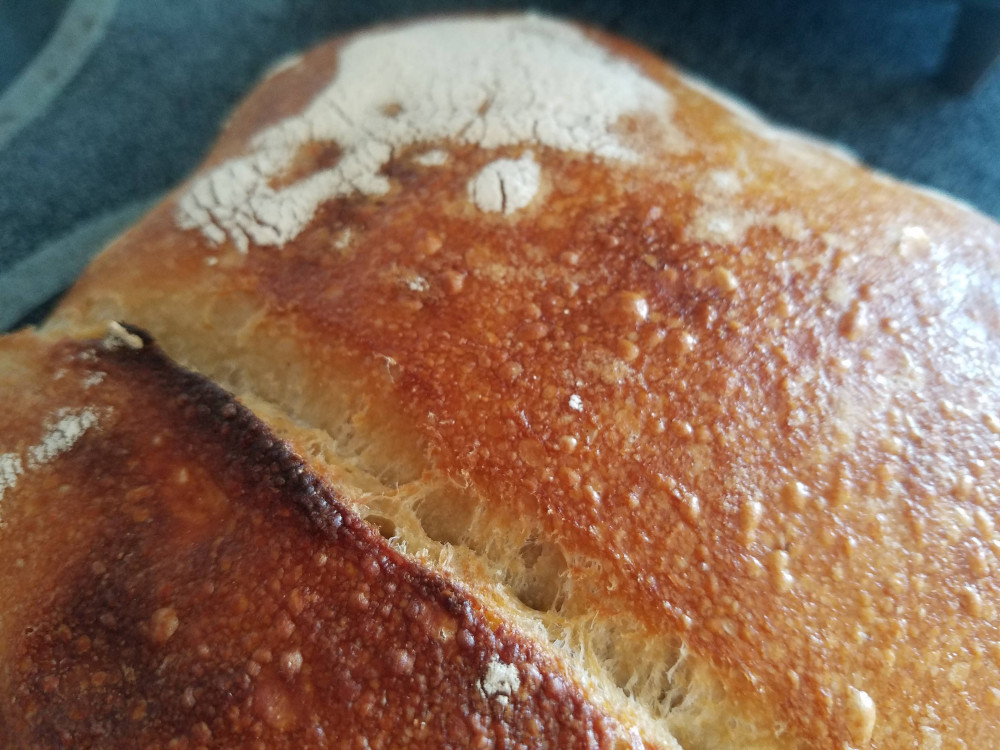
Using a pre-heated, covered dutch oven inside of a conventional oven does two important things. First, having it covered allows the bread to “self-steam”, resulting in a dramatically better crust (see Test 5). Second, preheating the dutch oven before putting the bread in absolutely takes the taste & texture of the crust to the next level. Make sure to take the lid off for the last 10 or so minutes of baking to crisp everything up.
Experiments & Explorations
Test 1: Starter
Before I made my first loaf, however, there was the matter of the formula for feeding the sourdough. Many different websites agreed that, if you have a starter that has languished in the back of the fridge, it would need several feedings before you could expect to use it in dough.
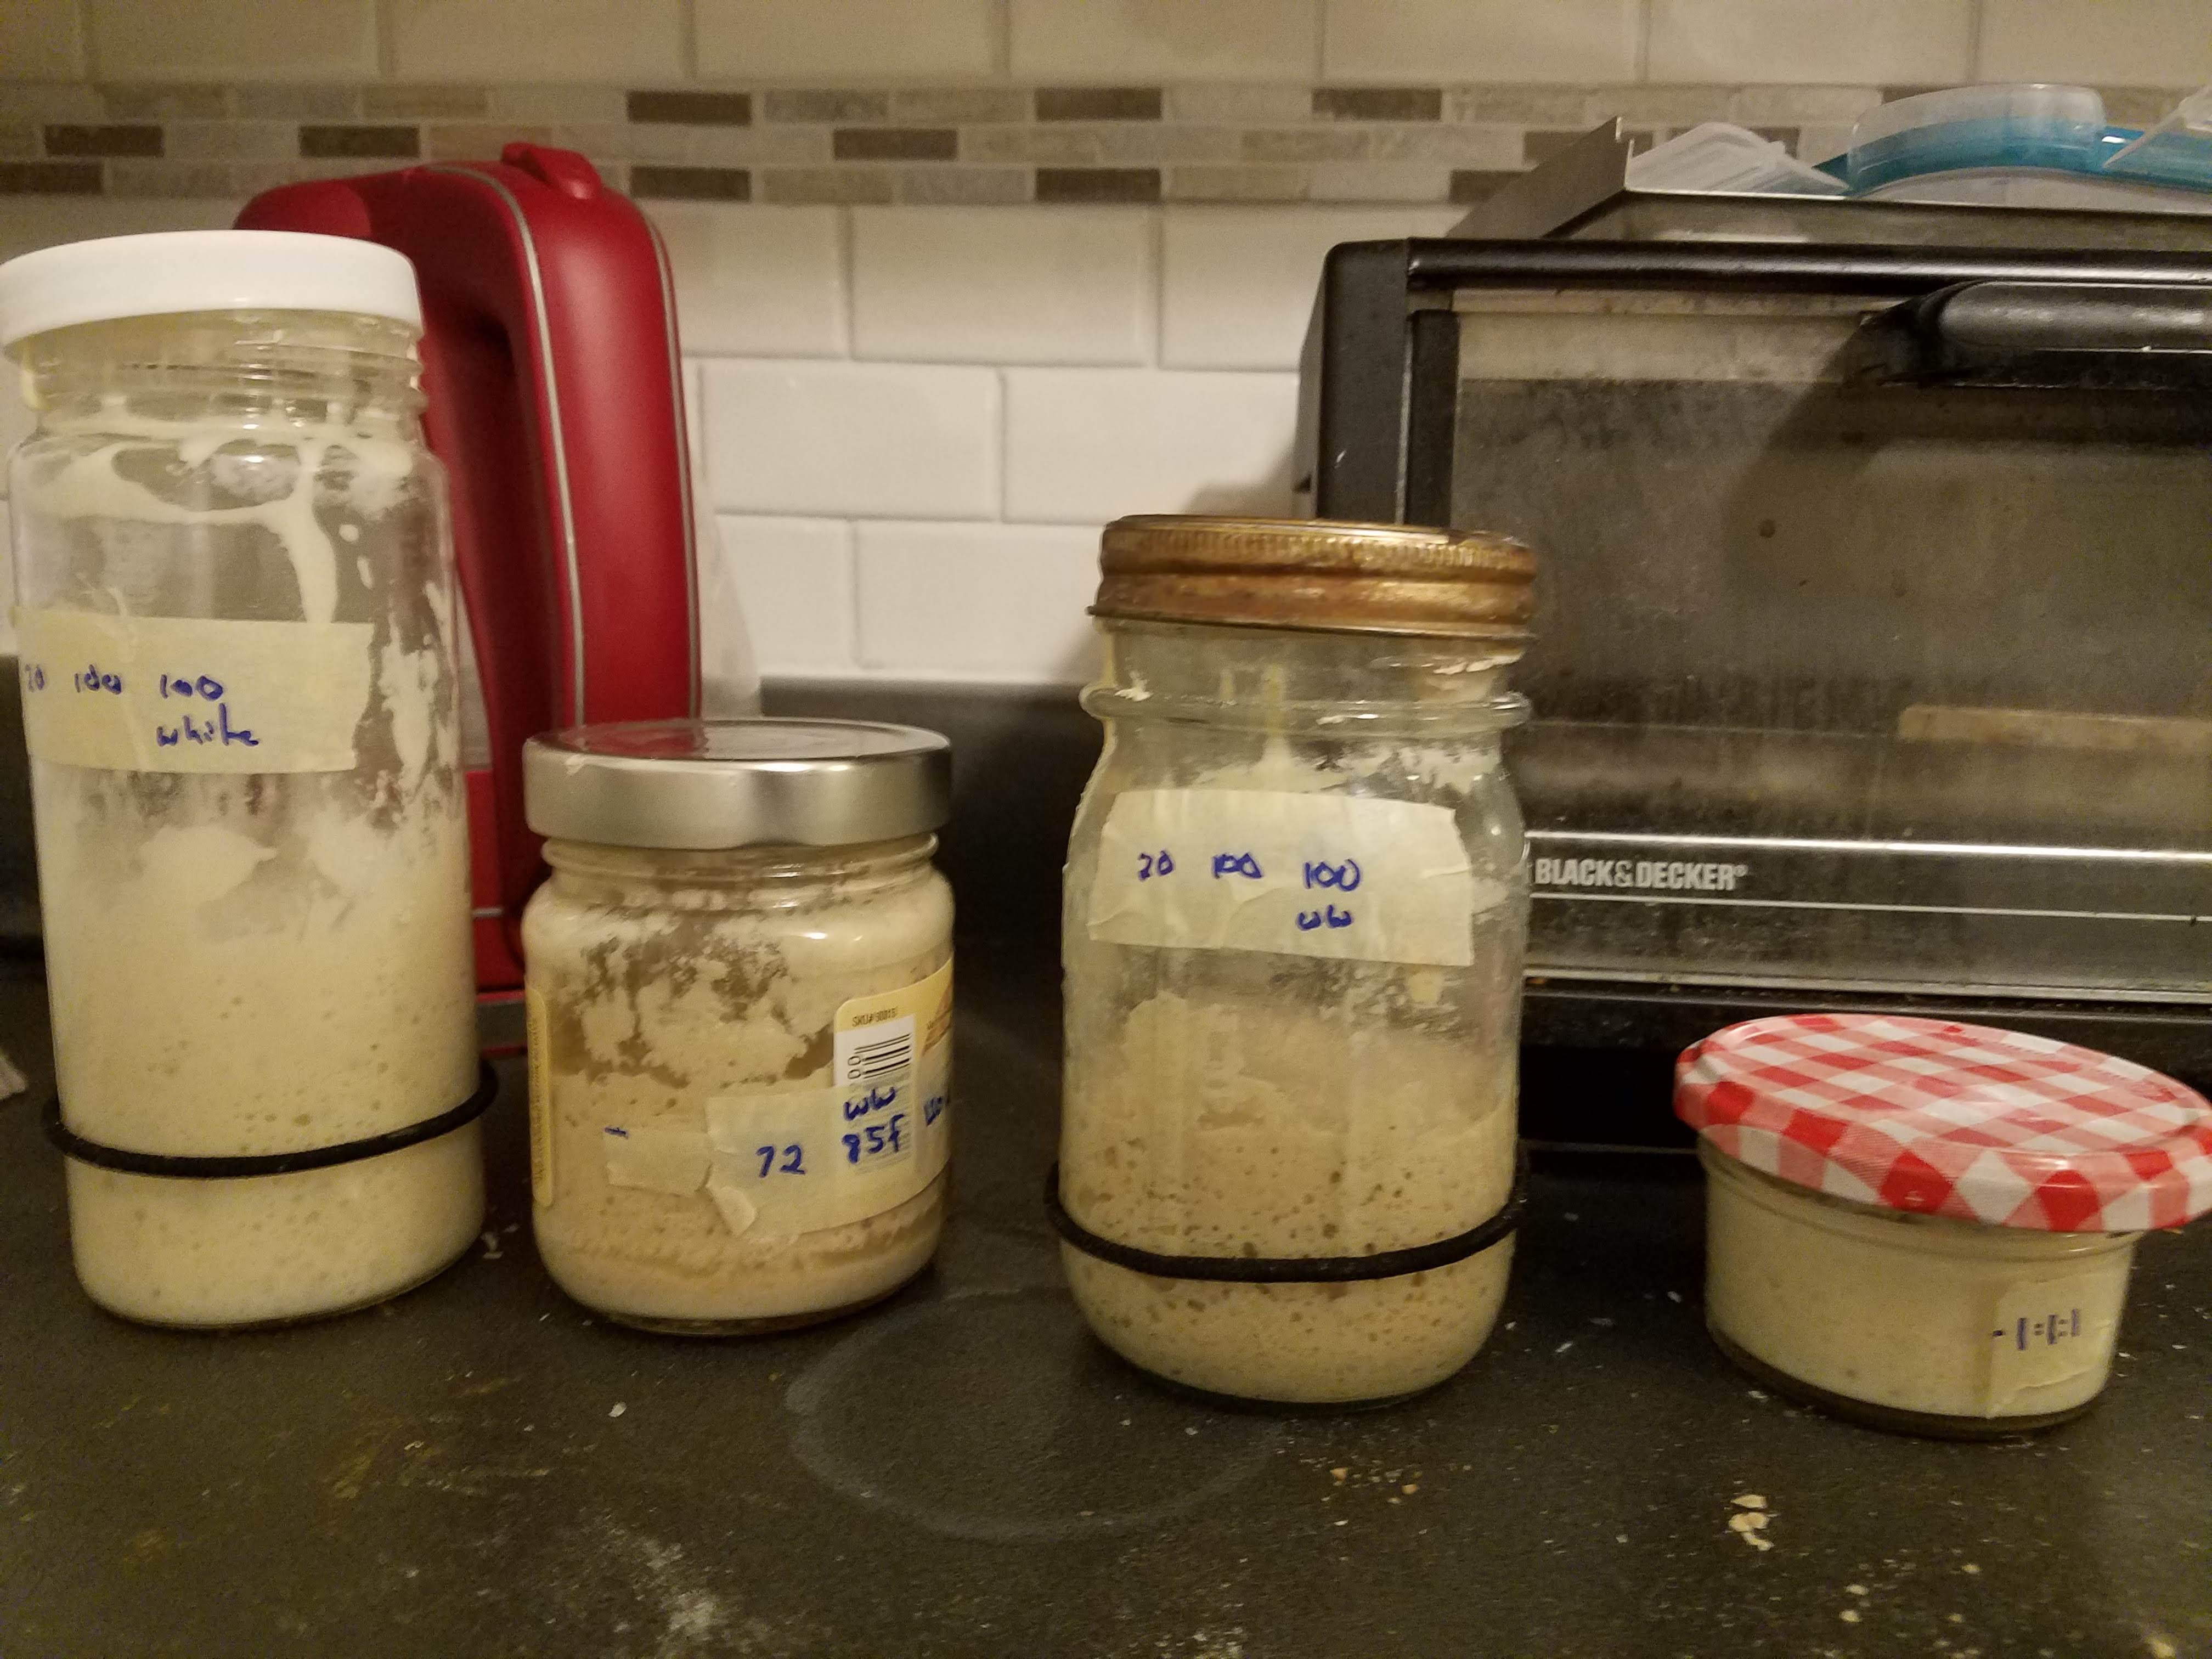
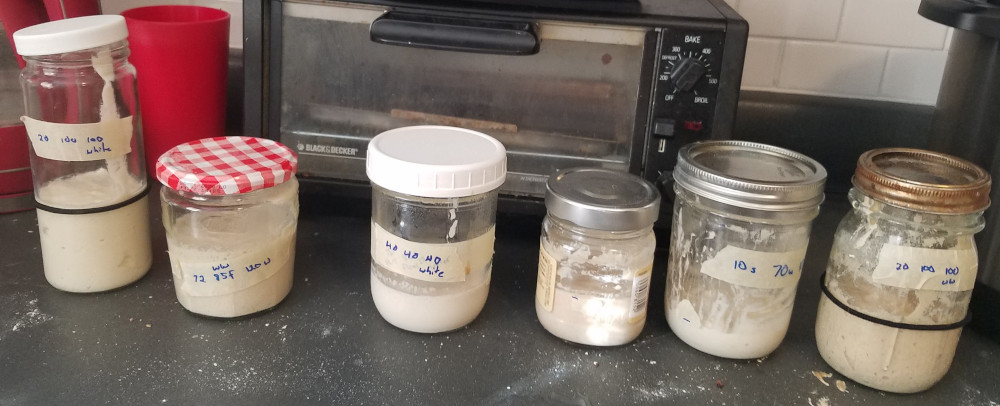
The formulas I tried as as follows: (starter / water / flour)
40 / 40 / 40 (1:1:1), 100% hydration - unbleached all-purpose
20 / 100 / 100 (1:5:5) 100% hydration - whole wheat
20 / 100 / 100 (1:5:5) 100% hydration - unbleached all-purpose
72 / 120 / 85 (6:10:7) 150% hydration - whole wheat
10 / 70 / 100 (1:7:10) 70% hydration - unbleached all-purpose
In addition to testing the ratios, I also wanted to see how all-purpose flour stacked up to my home-ground whole-wheat flour.
The “starter maintenance process” was agreed upon by most sources:
weigh out the amount of starter to retain, and discard or otherwise use the rest (See my flatbread recipe at the end of this post for a nice way to use it).
add in the prescribed amount of flour & water
cover it (to keep out bugs), but don’t seal it, so that gases can escape
leave it on the counter until it doubles. How long will that take? Well, it varies.
As I went through the work of feeding all of these starters twice a day, I gradually understood that a) the ratios are what this is about, not the exact number of grams (which makes sense when you think about it), and more importantly b) the % hydration is the real difference between these things. If I were to do this again, I would have a very different set of tests to run. But this was my first foray into sourdough, so I was mostly just taking the top several formulas that I found suggested :)
For the first day, I put a couple of the starters in our Instapot on low-yogurt setting to see if that would speed things up. It may have helped? After that I just left all of them on the counter.
Results
The 150% hydration starter was very easy to mix, but it doubled super quickly – 2-4 hours – which meant it needed feeding much more often than I wanted to feed it. It’s possible that the doubling speed was more due to the ratio of starter to new material instead of hydration.
The 70% hydration starter was much more difficult to mix, so I gave up on it after a couple days. Some bloggers said that using a low hydration is good if you want your starter to be left alone for several days – I might try that in the future.
The two 20 / 100 / 100 (white and whole wheat) starters seemed to be the most promising, and so after a few days they were the only ones I retained.
For my first many loaves I went with a split-test approach. Make two balls of dough – one would be the “control”, where I followed all the steps & ingredients of the original recipe, and one where I would change an ingredient or leave out a step, to see what happened. Here are the results of these experiments.
First bake: Focaccia

At the beginning, the prospect of a multi-day dough was a little off-putting, so I looked around for a sourdough recipe that could be started & finished on the same day, and landed on this recipe for sourdough focaccia.
I used the 20:100:100 all-purpose starter, and made a half-batch of the recipe. It absolutely blew me away! It was a very nice way to start out my sourdough experience.
A few days later I tried the recipe again, this time using the 20:100:100 whole-wheat starter, but I also changed several other things (different oven, sheet pan instead of glass 8x8, different rising time) and wasn’t as thrilled by the result.
Test 2: all-purpose vs whole-wheat start
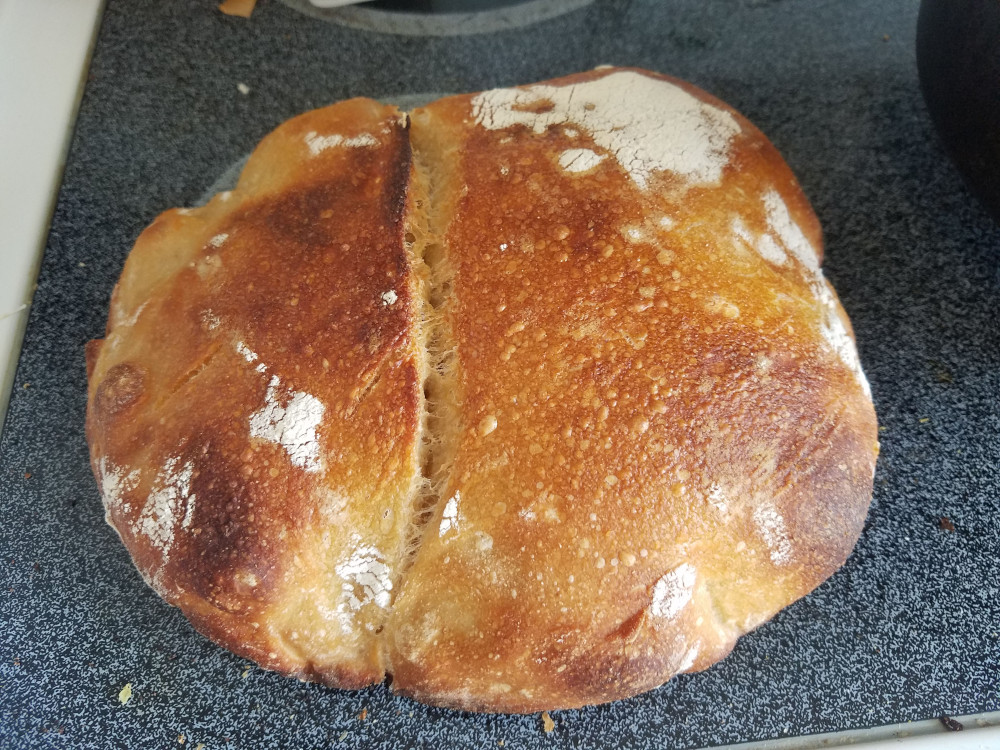
With that win under my belt, I decided to try out a loaf.
I did two 1/3-batches of the dough (so 37g starter, 84g all-purpose flour, etc.), where one was using the all-purpose (20/100/100), and one was using the whole-wheat (20/100/100) starter.
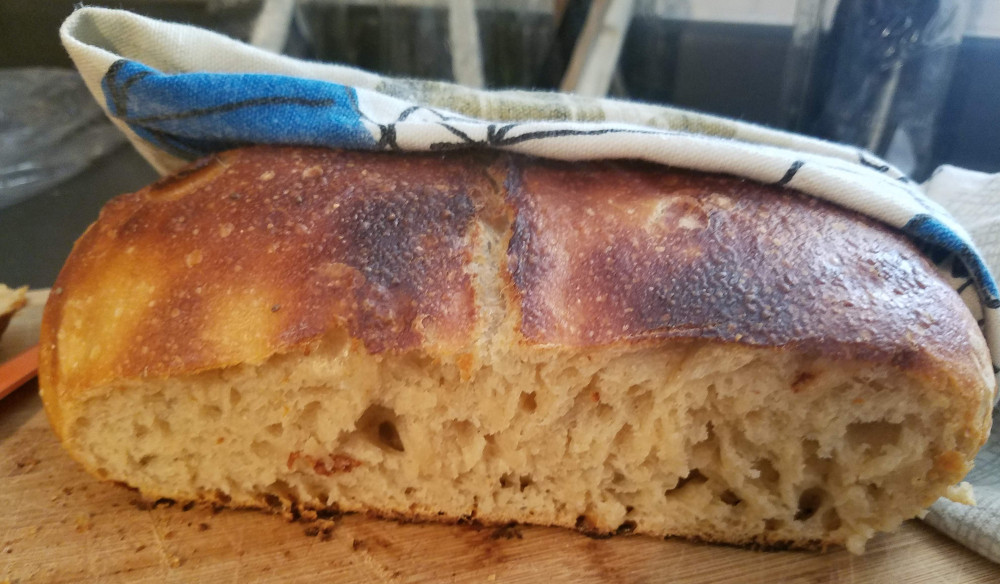
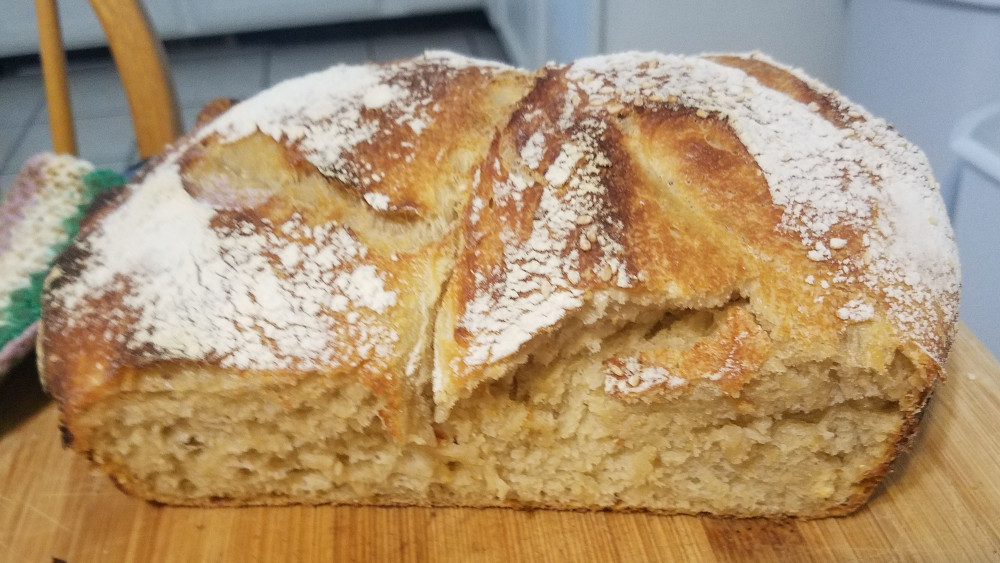
The resulting bread was ridiculously tasty. I couldn’t remember ever having bread taste this good (and I’m used to delicious home-made bread!).
Results
Taste: no difference. In a single-blind taste test, neither of us could even distinguish between the two halves of the loaf.
Rise: the all-purpose starter appears to have had a rather better rise than the whole-wheat starter.
Test 3: “Young starter” vs “old starter”
For my first two bakes, I had used “young” starter, which is sourdough starter that has only just doubled (e.g. was fed ~8 hours previous). This next test was to determine whether there were any adverse consequences from using an “old” starter – one that was fed 24 hours previous, and so had doubled and then collapsed.
Three hours after starting the dough, the “old starter” dough had risen rather more than the young starter dough, and the next morning, the old starter had a ton more bubbles.
However, when it came time to shape them, the young dough was much easier to work with. The old dough had lost its tension, and so was rather stickier.
Results
The dough made with “young starter” had a much better rise in the oven, and was easier to handle overall.
Taste-wise (and texture-wise) there wasn’t much of a noticable difference.
Test 4: Two turns vs no turns
A main motivation for my tests is “how little effort can I get away with and still have a great-tasting loaf.” So for this test I tried omitting the “turns” step. Keep in mind that I might be doing the “turns” completely wrong, invalidating this experiment.
Results
Crumb, rise, and crust all seemed to show no differences.
The one that had 2 turns tasted a litte more sour. We’d have to do another experiment (maybe with 5 turns vs 0 turns) to nail down the effect.
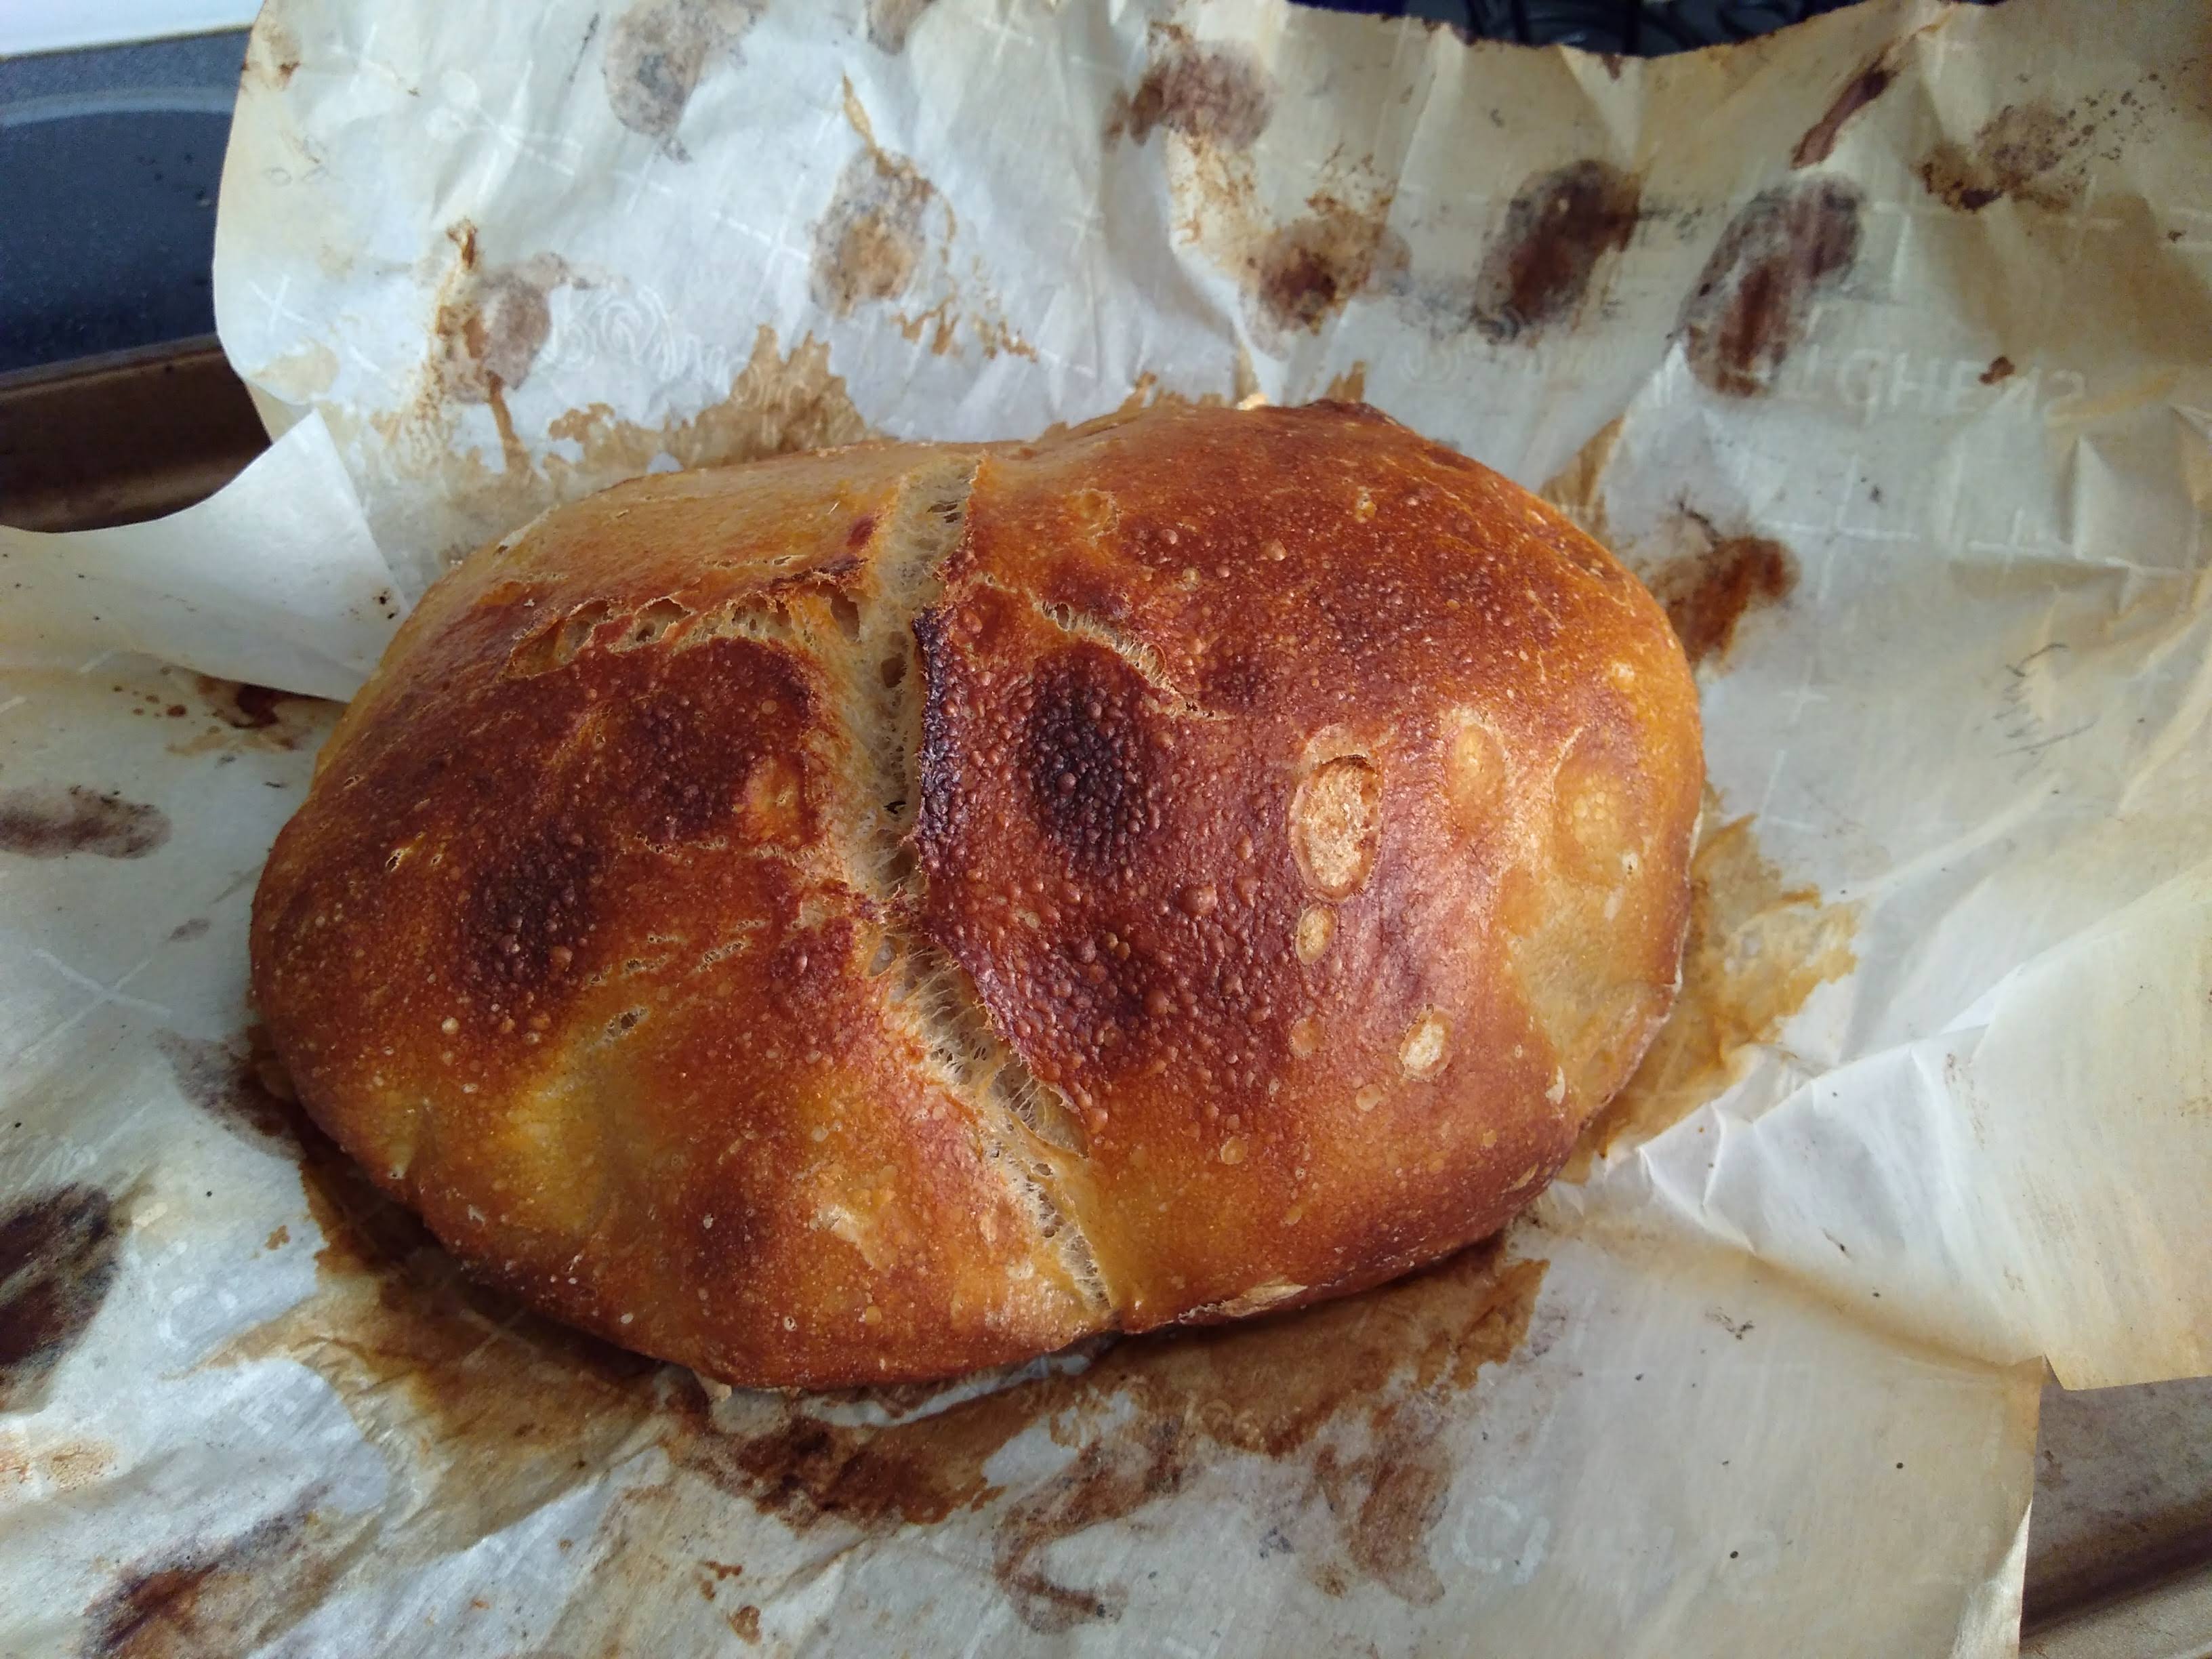
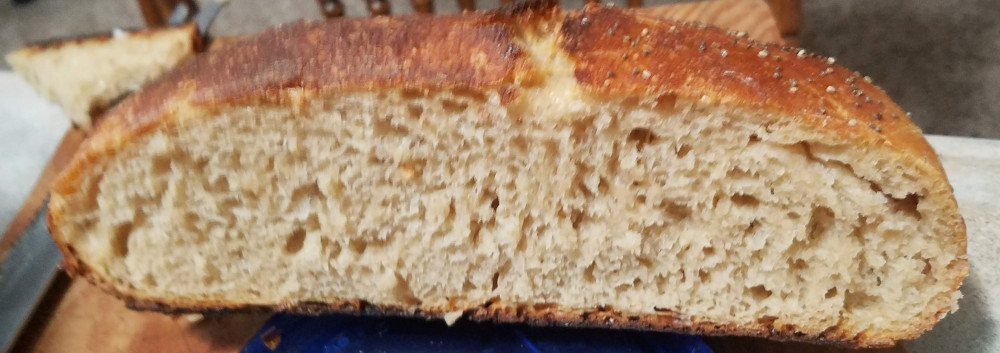
Test 5: Forgetting to put the lid on the dutch oven
This test was going to be “No work but final shaping”, but an oversight in the bake changed the nature of the experiment quite a bit.
Results
Having the lid in the dutch oven makes a huge difference! I don’t have access to a “self-steaming” oven, but it would be interesting to evaluate how that works, as I understand the thing that the lid is doing is trapping steam. I’ve also heard that you can get yourself a little steam by putting in a tray of water underneath the bread, but I haven’t tried that either.
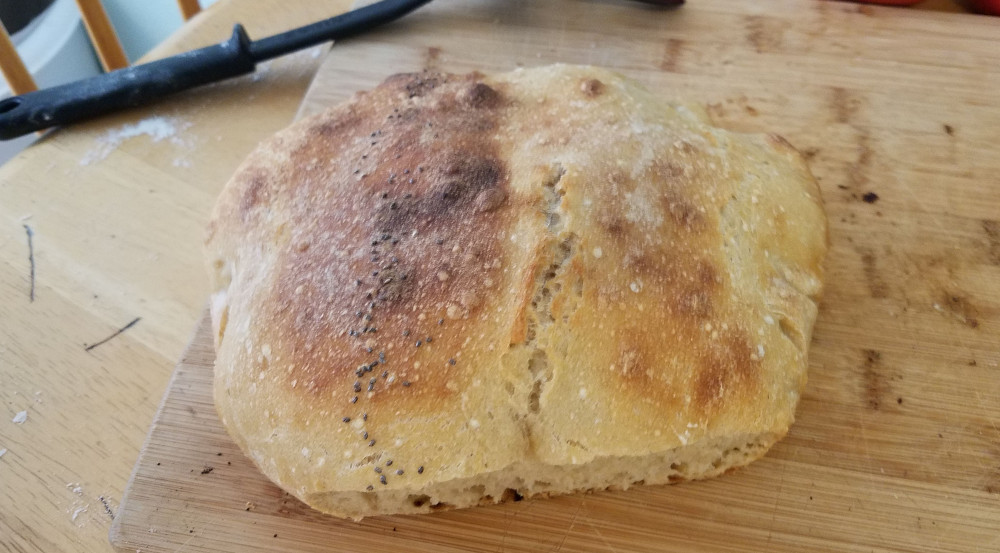
Test 6: No work but final shaping
No autolyze, no turns, no bench rest. The only thing that could be more lazy is to omit the final shaping + rise, but I wasn’t quite ready for that.
For this test, I used the following steps:
Mix starter, water, flour, and salt in a bowl.
Let rest overnight (bulk rise).
Dump on the counter, shape with bench scrapers, and place onto the parchment-paper-lined container for the final rise.
Continue from step 7 as normal.
Results
The final shaping was somewhat more difficult with the dough that hadn’t been worked at all previously – it was more sticky, harder to form into a ball.
However, the final texture, taste, crust, etc. didn’t really seem to be impacted.
I wonder if those steps become more critical when you’re working with a lower hydration dough?
Test 7: Seeds
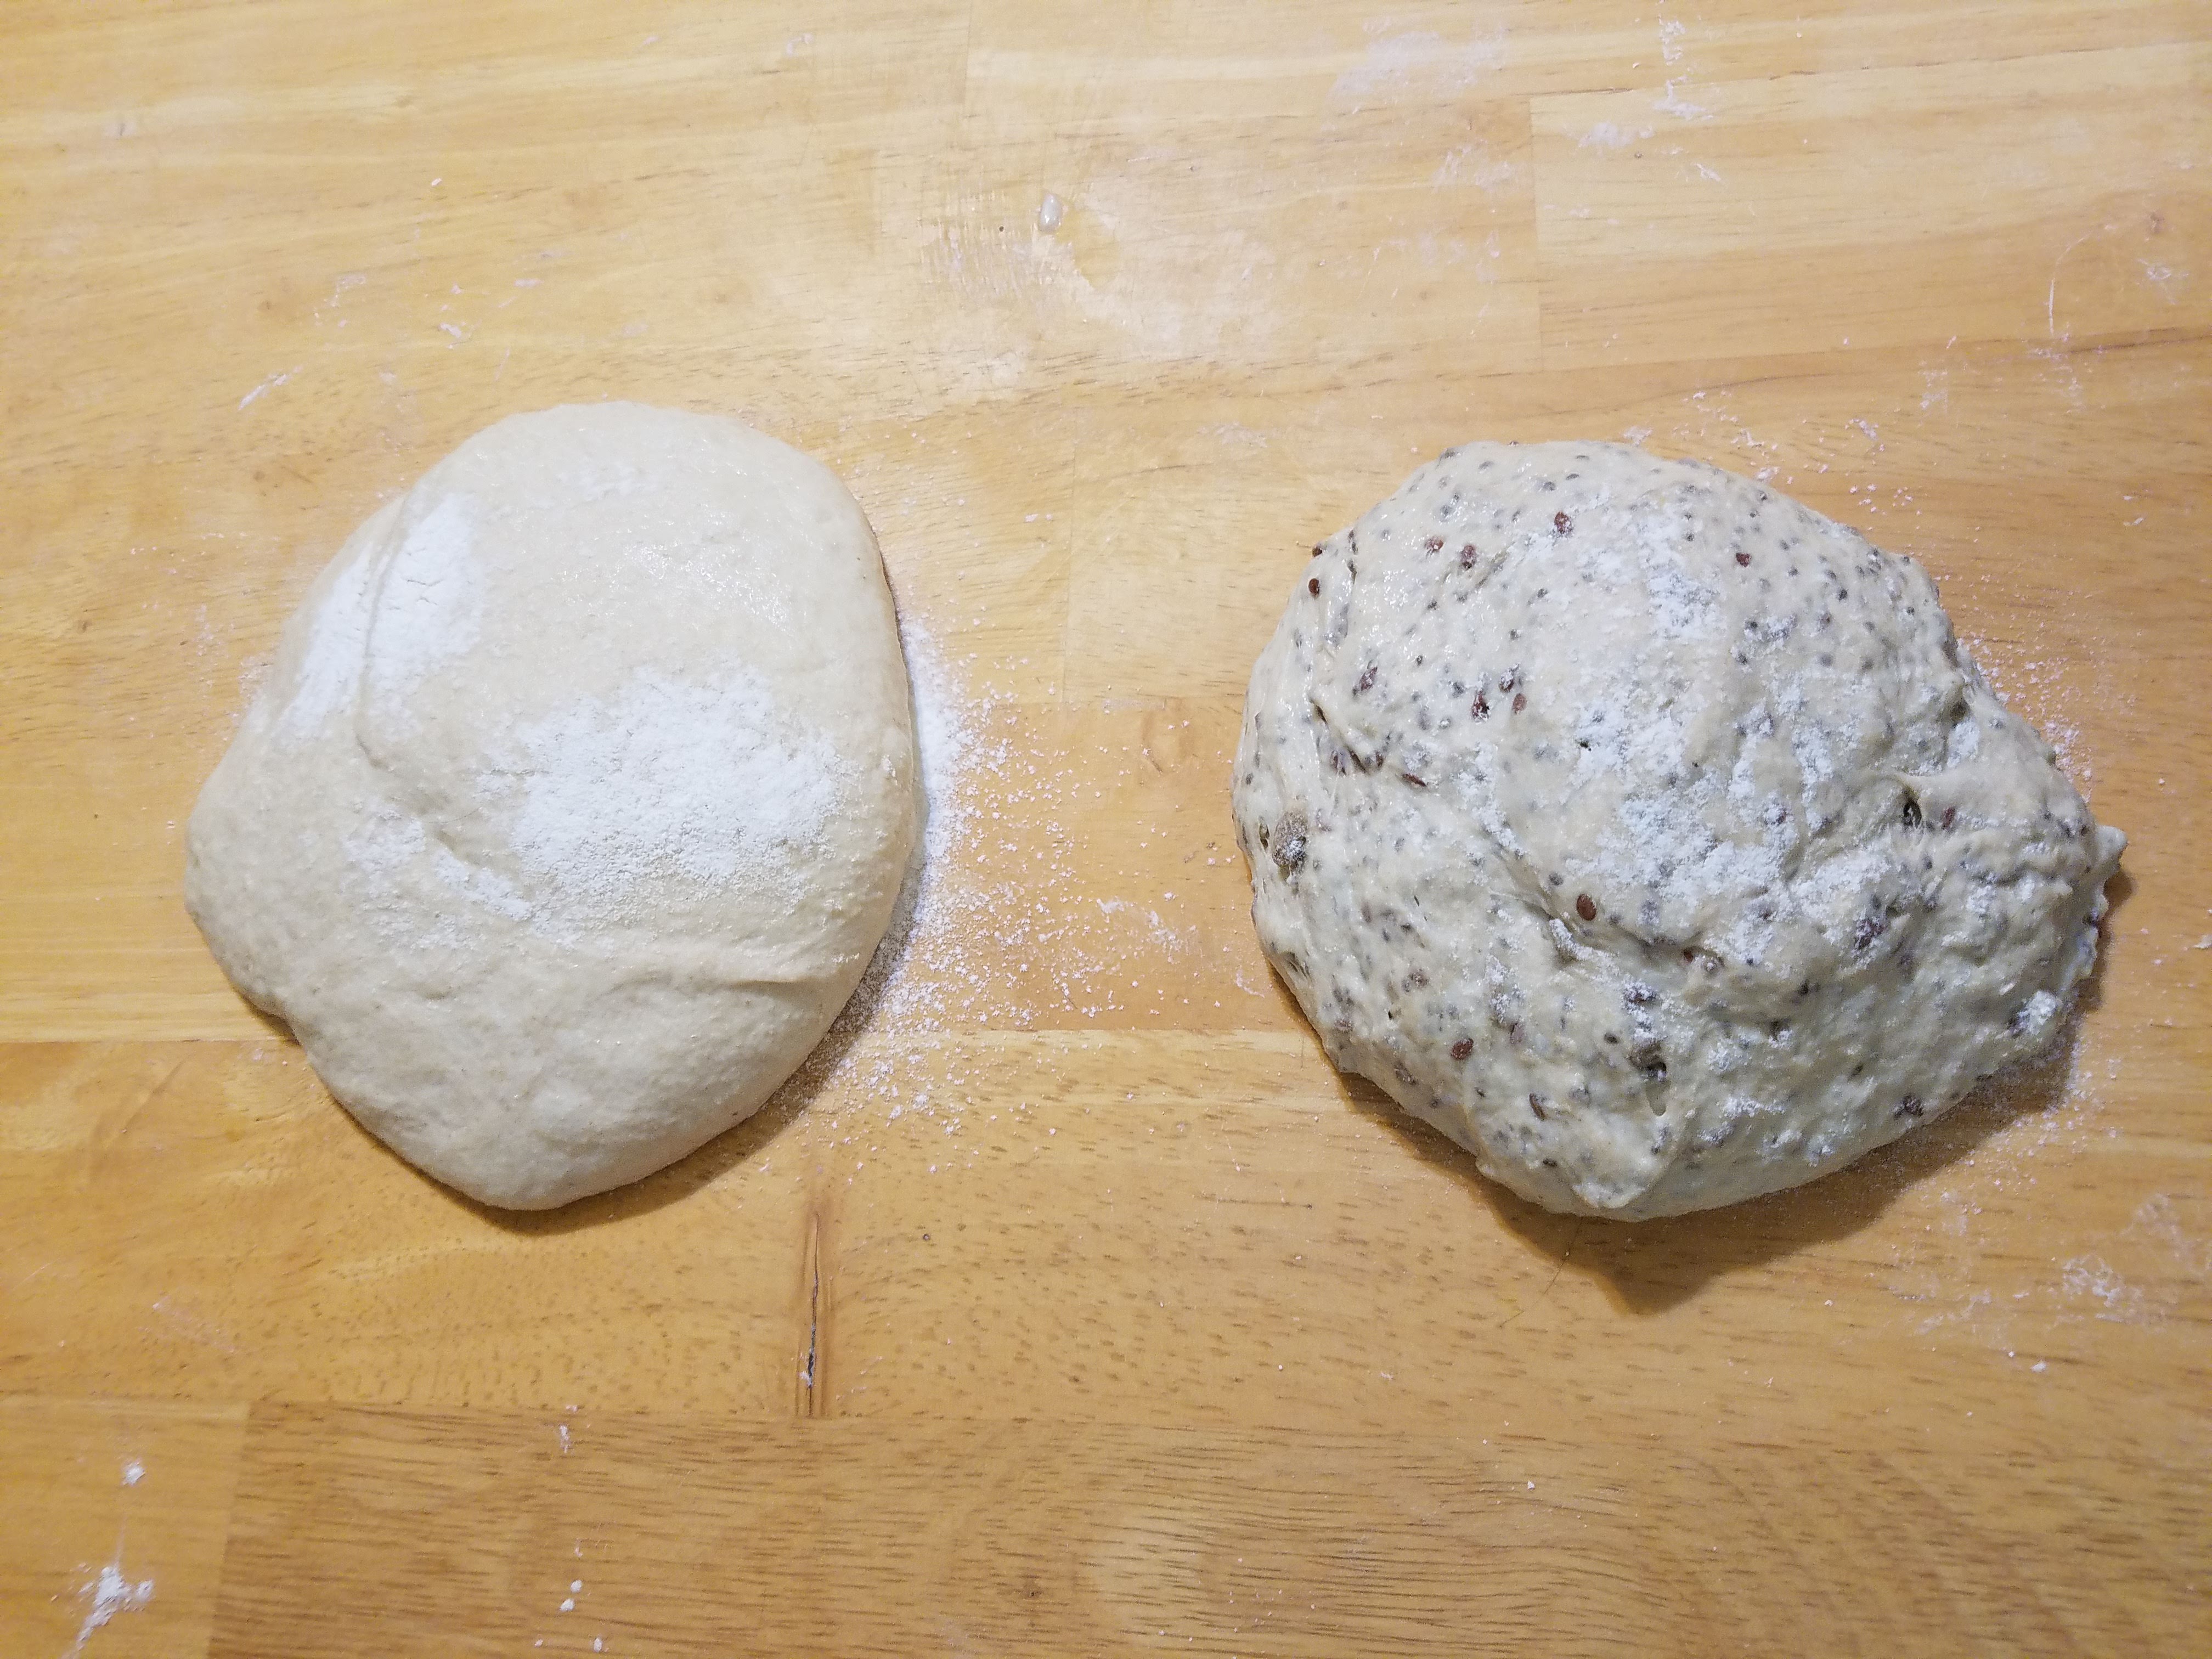
My previous go-to bread recipe involved a generous addition of seeds – chia, flax, and sunflower – and I wanted to see how they would play in this sourdough.

Results
The dough was rather drier & easier to work with, because the seeds absorbed some of the water. They also broke up the surface, resulting in less “surface tension” development during shaping.
The resulting crumb and crust were just as good as the plain half, with of course the delightful textural & flavor additions of the seeds.
Test 8: Cranberry Walnut
My wife’s favorite sourdough loaf that we would get from a baker at the local farmer’s market in the summer is a cranberry walnut, so I decided to try my hand at it.
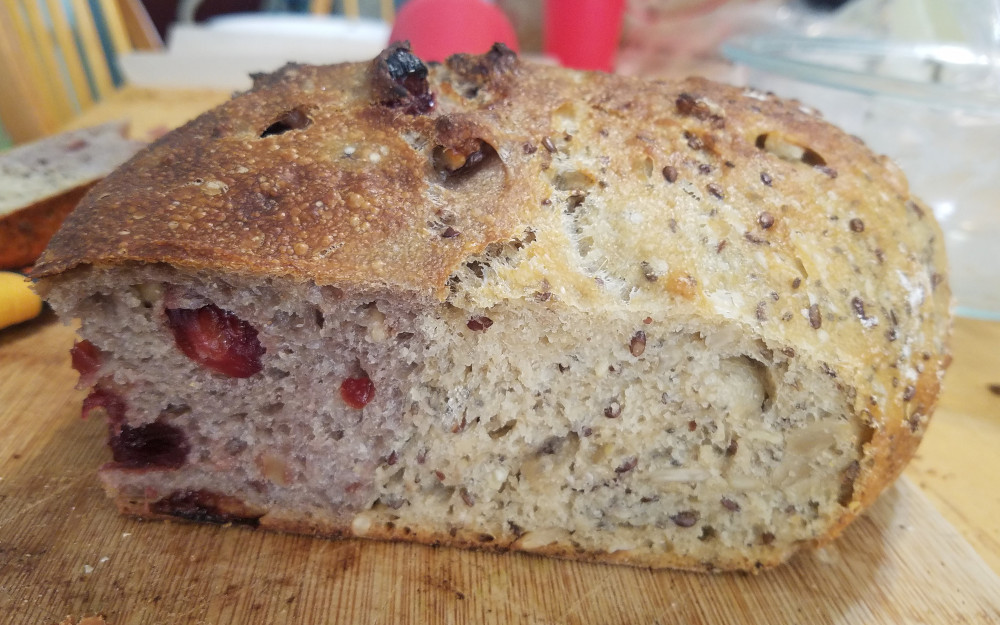
Results
The bread was beyond my wildest dreams. The craisins had partially reconstituted from the overnight rise, and added a wonderful flavor to the whole loaf (and a fetching purple tint), while the walnuts complemented them perfectly.
In contrast to the seeds loaf, the mixins in this dough didn’t substantially impact the shapability (surface tension) or consistency of the dough.
Test 9: Heavy Cream
I’m a huge fan of heavy cream, and earlier in 2019 I started substituting heavy cream for 1/3 of the water in my standard whole-wheat bread recipe. In that dough, adding cream enhanced the flavor, the crumb, and the crust of the finished bread. This test was to see how it played in a sourdough context.
Results
The dough was a little firmer, and therefore easier to work with.
The resulting crumb was wetter, “creamier”, but honestly it didn’t need it. And the creaminess seemed to get in the way a bit of the natural sourdough flavor. I probably won’t be doing this again.
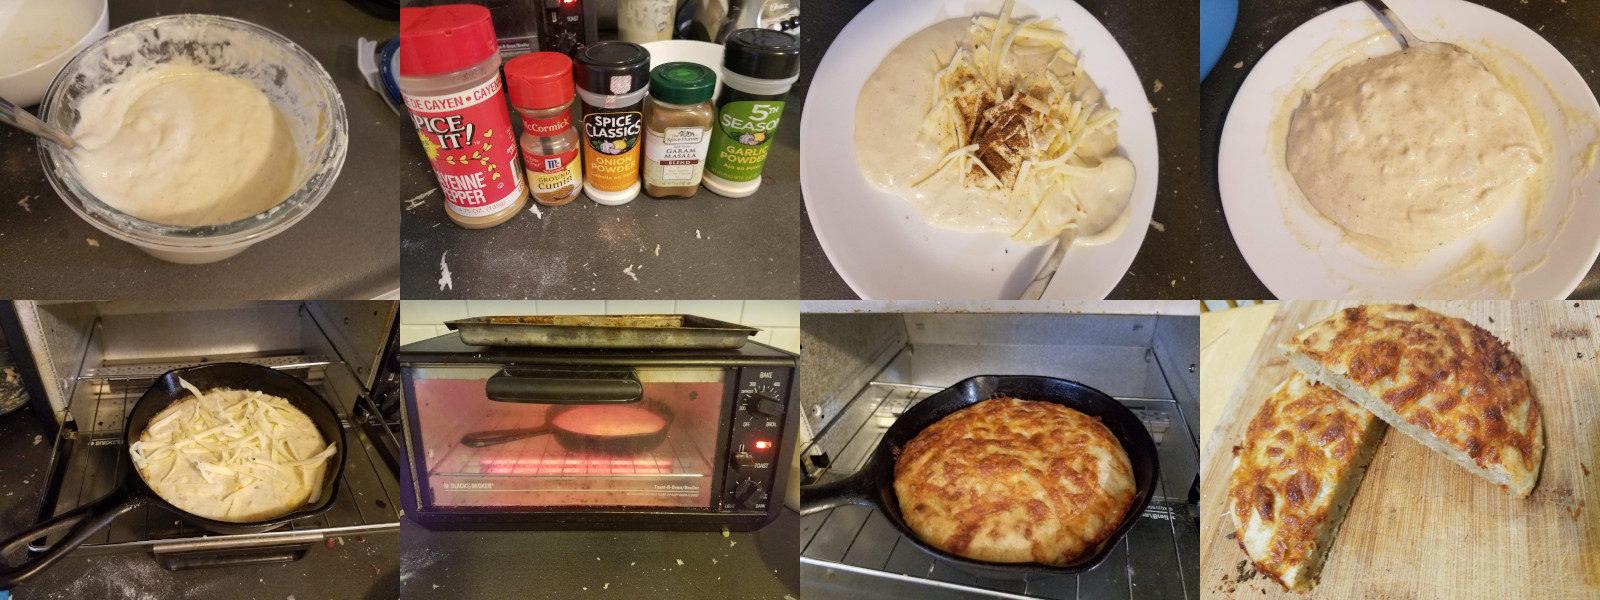
Bonus recipe: discard starter flatbread
I got this idea from this youtube video where they make a “scallion sourdough pancake”, but I modified it because a) I don’t tend to have scallions around, b) I always need more Garam Masala in my life, and c) I’m lazy and tending flatbread on the stove is more work than ~baking it in the toaster oven.
In our fridge, I’ve got a lidded glass container where I put my sourdough discard. Each time I feed the starter when I’m not making bread immediately, I add the excess to the container. Then a couple times a week, we take some out to make these flatbreads for breakfast. The starter has kept just fine for multiple weeks without issue.
Ingredients
Some discarded sourdough start (probably between 1/2c and 1c). It doesn’t matter how old it is (I’ve had fine results with start up to 36 hours old on the counter, and up to a couple of weeks in the fridge)
Some grated pepper jack cheese (cheddar works fine, too), like 1/4 cup or so, plus a little more to go on top.
Spices: garam masala, cumin, salt, pepper, cayanne, garlic powder, onion powder.
Sometimes I mix in a teaspoon or so of room-temperature butter.
Equipment
A plate to mix things on (or a mixing bowl if you want to be fancy)
A toaster oven
A mini cast-iron frying pan
Instructions
Add some butter to the frying pan, and then preheat it in the toaster oven, turning it up as high as it claims to go (mine says 500º but who knows what it’s doing).
Mix all the ingredients on a plate, or in a bowl or something. I generally use a spatula or a metal spoon to mix things.
Pull out the frying pan, and scrape the mix into it with a spatula. Top with a little more grated cheese.
Put it back in the toaster oven, close the door, and wait for 10-20 minutes, or until you’re tired of waiting. I generally push down the “toast” lever once at the beginning to get things hot, and once at the end to brown the cheese on top.
You’re done! Wait for it to cool before eating, or don’t.
I have no idea how much the little cast-iron frying pan is helping here. You could probably cook it in the little tray in the toaster oven if you wanted to, and it would be fine. Also, I’m sure this will work cooked in a frying pan on the stove (although it might be harder to get the nice crisp on the cheese), or baked in the oven (it just seems like overkill for something this small).
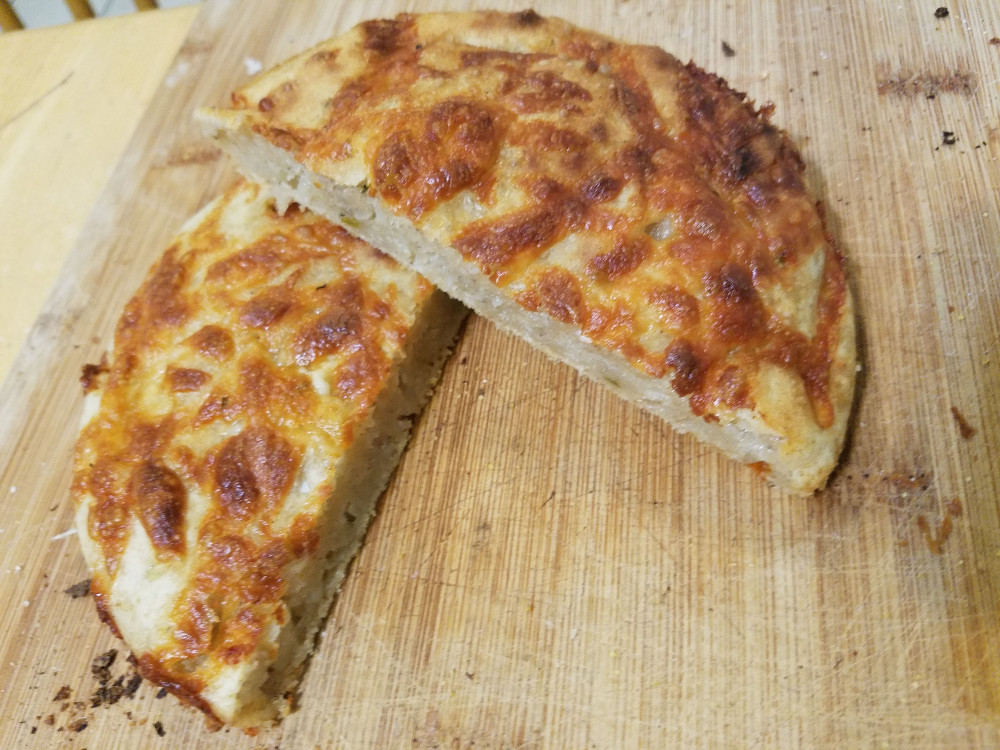
We’ve had this for breakfast a number of times in the past weeks, and we love it.